3ds Max Articles

I’ve been the content manger for the 3ds Max section of AugiWorld Magazine for several years now.  During this time I’ve produced numerous tutorials and articles for the AugiWorld Magazine:

What’s New in 3ds Max 2022

Collaboration for 3ds Max

12 Tips and Tricks You Need to Know

Professional Results Quickly

This is the Way

Machine Learning and AI

Paths to Success

Customize 3ds Max with Script Buttons

Digital Magician

Strategies for Implementing 3ds Max for the Entrepreneur

3ds Max Plugins

What’s New in 3ds Max 2021 

Finding Work-Life Balance as a 3ds Max Artist

3ds Max Pro Tip: Use Custom Modifiers

3ds Max with V-Ray and Unreal Engine

Tips that Never Get Old – A few tips and tricks with 3ds Max.

tips

Tips for Beginners (Modifier Editor) – Exploring some of the uses of the modifier editor.

moded1

Advanced Tips for More Realistic Visualization – Covering more advanced settings inside the VRAY frame buffer.

vrayBuffer

Realistic Interactive Realtime Rendering – Presenting 3ds Max to Unreal workflow.

imreal

Education and Training – Non-traditional methods to educate yourself.

render

Customization with 3ds Max 2018 – Discussing Custom start-up files, templates, toolbars, and materials.

customize

Level Up with 3ds Max – Presenting hard-surface scene construction concepts.

level up

Online Collaboration for 3ds Max – Presenting four useful sites that can be used to share and review 3ds Max content.

collaboration

Managing Assets for 3ds Max – Discussing version control and more.

versopm

Four Favorite Plug-ins – Discussing some plugins for 3ds Max.

mats

Creativity Unleashed – Discussing new features in 3ds Max 2019.

whatsnew

20 More Tips and Tricks for 3ds Max – Expanding on the first 50 Trips and Tricks posted a few years before.

tricks

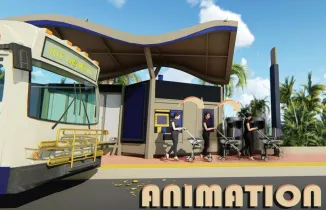
Professional Presentation for Designers – Discusses animation timing, blocking, motion, keys, composition, and content.

bus

Advanced Techniques – Covers manipulating textures using the Slate Editor and nodes, Advanced Data Manipulation and the Particle View, Particle Systems, Substance Painter with 3ds Max and using maps for alternate scenarios.

advanced

3ds Max Interactive – Introduction to the new powerful tool for VR and visualization for 3ds Max and Maya.

interactive

Education Triumvirate – Discussing how to use available resources to learn 3ds Max.

image

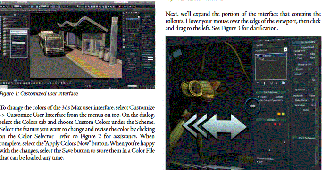
Customize 3ds Max – Working with color schemes, expanding rollouts, and customizing quad menus.

custom

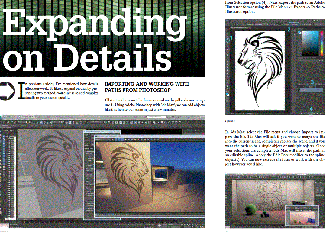
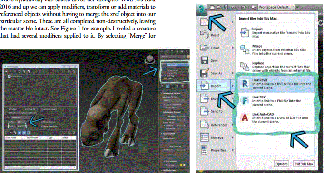
Expanding on Details – Demonstrate using work paths, subdiv, and displace modifier to add details to scenes.

details

Tools for Collaboration – Using non-destructive options with xrefs, File Link Manager for Revit connections and the design workspace.

collaboration

Covering Details – Demonstrating how details can add character to scenes.

hair and fur.jpg

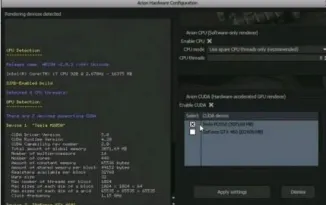
Implementation of Arion Renderer – Discussing Arion Renderer and basic implementation.

Arion

3ds Max 2018 Highlights – Introducing updates with 3ds Max 2018. pic

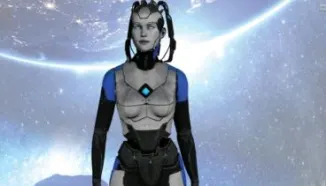
Manage Still Image Post-Production Elements – Using render elements and PSD Manager with Photoshop for post-production work. bildings

Introduction to MassFX – Working with MassFX to add interest to a scene. lollipops

Advanced Lighting: Light Balance with 3ds Max – Applying light balance to scenes in 3ds Max.  lightbalance

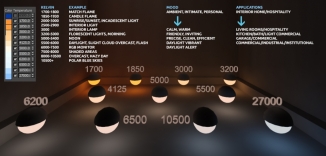
Reflections on Lighting – Introductory to lighting setup and analysis.  image1

Reach Out with 3ds Max – Focused on encouraging the use of art and 3ds Max to communicate, teach, and understand one another. egypt

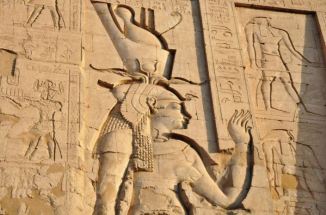
Max Creation Graphs – Using and creating Max Creation Graphs (MCGs) for 3ds Max

mcg

Max Efficiency – Article discussing how to manage 3ds Max data effectively

cat

Collaboration with 3ds Max and Stingray Article introducing Stingray as a realtime solution for visualization purposes. stingray

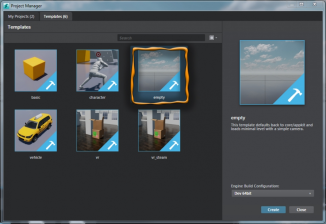
Future of Visualization Article discussing how the visualization industry is impacted by today’s technology.live

Third-Party Options Helpful, affordable plugins for 3ds Max.Brian_Chapman-AW-0616-03_452_229

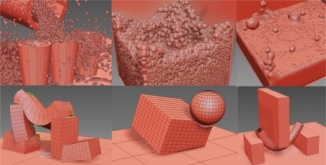
New Release, Packed with Improvements teapot

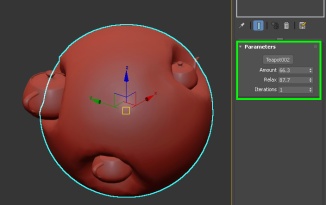
Material Management Proper use of materials in 3ds Max Brian_Chapman-AW-0416-01

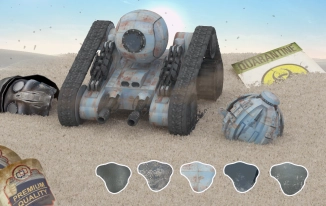
Tricks with Scripts (Time-saving tricks using the MAXScript language in 3ds Max)1

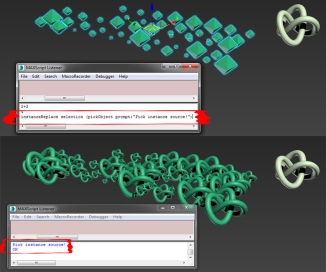
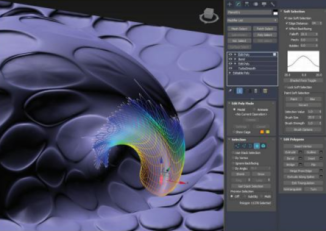
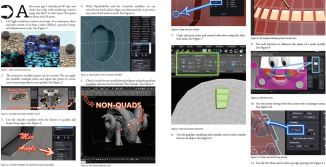
Retopologizing a Mesh in 3ds Max (Digital sculpting with 3ds Max and other software)2

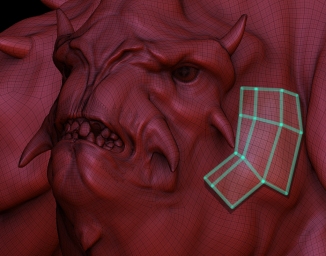
Constructing an Interior Scene in 3ds Max (Creating an interior scene using 3ds Max, VRay, and Photoshop)Main

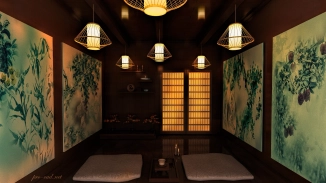
Keeping it Civil in 3ds Max (Using 3ds Max with Civil View and Civil 3d)Figure 1

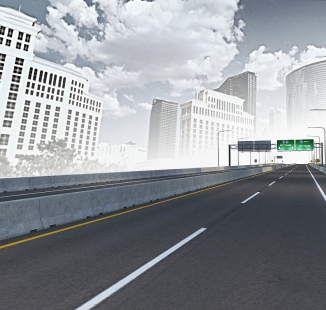
The Digital Artist (Design Fundamentals)Figure 3 - Shapes in Complex Parts.png

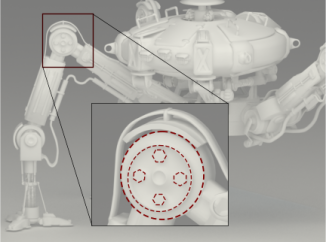
Creating Custom Textures with the Viewport Canvas (Working with textures, color and contrast)Figure 11 - Brush Images

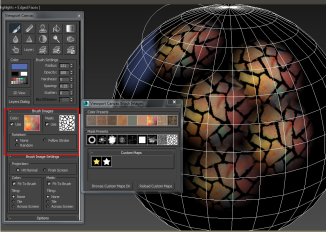
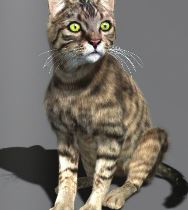
Bringing Characters to Life (Manual character construction)
Figure 1 - Bot Needs Karate Lessons.png

Creating Visual Effects with Atmospheric Apparatus and Rayfire (Working with 3ds Max effect tools) Figure 1

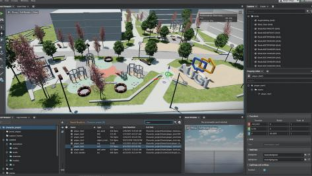
Manage Large Scenes in 3ds Max (Tools that help manage large, detailed scenes) Fig 1 - Housing Development in 3ds Max

50 Fast Tips & Tricks for 3ds Max (Quick timesavers for 3ds Max users) Figure2

Intro to 3ds Max (Getting started) FIGURE1

3ds Max Versatility (Explores how to use 3ds Max in unconventional ways) Brian_Chapman-AW-1214-01.jpg_452_369

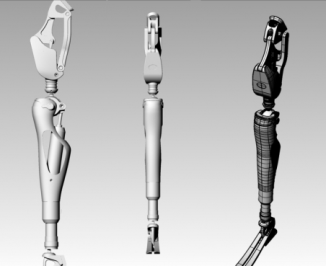
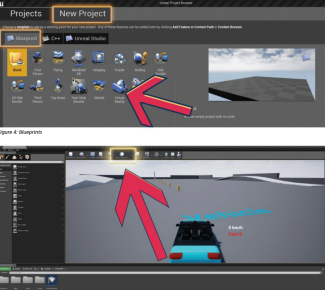
Make Game Development Child’s Play (Demonstrating game development with 3ds Max and the CryENGINE 3)  FinalFigure

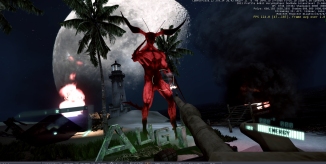
Max Management Tips (Variety of usage tips for 3ds Max 2015) Brian_Chapman-AW-0714-01

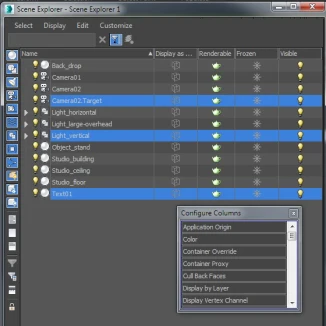
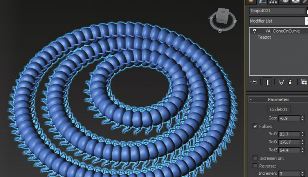
Powerful Para 3d (A plug-in for controlling arrays in 3ds Max) Brian_Chapman-AW-0614-02.jpg

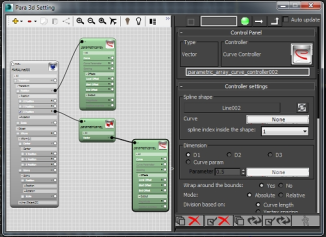
Performance, Productivity Increases (Introducing 2015 features) Brian_Chapman-AW-0414-01

Interview with the Artist (Q & A with Jose Alves da Silva) Figure 1

Quality Content with Max Plug-ins (Introducing Vray, CityTraffic, and Forest Pack Pro) CityTraffic Example

Not Just for Games (Q & A with Seid Tursic and presentation of hair and fur module) Mouse With Fur

Unity Script for Basic Camera Control and Behavior

This is a script you can add to a Unity Camera to give it basic controls mimicking the functions of the scene view:

using UnityEngine;
using System.Collections;

public class CameraBehavior : MonoBehaviour
{

public float Normal_Speed = 25.0f; //Normal movement speed

public float Shift_Speed = 54.0f; //multiplies movement speed by how long shift is held down.

public float Speed_Cap = 54.0f; //Max cap for speed when shift is held down

public float Camera_Sensitivity = 0.6f; //How sensitive it with mouse

private Vector3 Mouse_Location = new Vector3(255, 255, 255); //Mouse location on screen during play (Set to near the middle of the screen)

private float Total_Speed = 1.0f; //Total speed variable for shift


void Update()
{


    //Camera angles based on mouse position
    Mouse_Location = Input.mousePosition - Mouse_Location;

    Mouse_Location = new Vector3(-Mouse_Location.y * Camera_Sensitivity, Mouse_Location.x * Camera_Sensitivity, 0);

    Mouse_Location = new Vector3(transform.eulerAngles.x + Mouse_Location.x, transform.eulerAngles.y + Mouse_Location.y, 0);

    transform.eulerAngles = Mouse_Location;

    Mouse_Location = Input.mousePosition;


    //Keyboard controls

    Vector3 Cam = GetBaseInput();
    if (Input.GetKey(KeyCode.LeftShift))
    {


        Total_Speed += Time.deltaTime;

        Cam = Cam * Total_Speed * Shift_Speed;

        Cam.x = Mathf.Clamp(Cam.x, -Speed_Cap, Speed_Cap);

        Cam.y = Mathf.Clamp(Cam.y, -Speed_Cap, Speed_Cap);

        Cam.z = Mathf.Clamp(Cam.z, -Speed_Cap, Speed_Cap);


    }
    else
    {


        Total_Speed = Mathf.Clamp(Total_Speed * 0.5f, 1f, 1000f);

        Cam = Cam * Normal_Speed;


    }

    Cam = Cam * Time.deltaTime;

    Vector3 newPosition = transform.position;

    if (Input.GetKey(KeyCode.Space))
    {


        //If the player wants to move on X and Z axis only by pressing space (good for re-adjusting angle shots)
        transform.Translate(Cam);
        newPosition.x = transform.position.x;
        newPosition.z = transform.position.z;
        transform.position = newPosition;


    }
    else
    {


        transform.Translate(Cam);


    }

}

private Vector3 GetBaseInput()
{
    Vector3 Camera_Velocity = new Vector3();

    float HorizontalInput = Input.GetAxis("Horizontal"); // Input for horizontal movement
    float VerticalInput = Input.GetAxis("Vertical"); // Input for Vertical movement

    // Horizontal movement
    Camera_Velocity += new Vector3(HorizontalInput, 0, 0);
    // Forward and backward movement
    Camera_Velocity += new Vector3(0, 0, VerticalInput);

    // Downwards movement (Y-axis) when Q is pressed
    if (Input.GetKey(KeyCode.Q))
    {
        Camera_Velocity -= new Vector3(0, 1, 0);
    }

    // Upwards movement (Y-axis) when E is pressed
    if (Input.GetKey(KeyCode.E))
    {
        Camera_Velocity += new Vector3(0, 1, 0);
    }

    return Camera_Velocity;
}

}

Vertex Normals to Face

This is a simple melscript to set the normal vertices of selected objects to the face in Maya. Useful for cleaning up models other people provide. #maya #melscript

string $selectedObjects[] = `ls -selection`;

for ($obj in $selectedObjects) {
    select -cl;
    select -r ($obj + ".vtx[*]");
    selectType -vertex 1;
    polySetToFaceNormal -setUserNormal;
    select -cl;
}

Unity Projector Intensity

For those in Unity’s trenches: Rendering light and shadows is costly, which is a problem for mobile and web development. The Unity Projector object allows us to mimic lights and shadows using materials to eliminate that cost. Adjusting that intensity without code is a problem. The object can be duplicated on top of itself to increase the intensity, but that’s not ideal or efficient, nor does it reduce intensity. The alpha value doesn’t adjust the intensity, nor do any of the material properties. To adjust the value, you have to multiply the RGB colors of the texture. The code below adds a slider that does just that.

Happy coding!
#Unity3D #Unity #MobileDevelopment #WebDevelopment #Rendering #Shadows #Optimization #UnityTips #Design #CodeSolutions #Development

using UnityEngine;
 
[RequireComponent(typeof(Projector))]
public class ProjectorIntensityAdjuster : MonoBehaviour
{
    [SerializeField, Range(1f, 3.0f)]
    private float intensity = 1f;
 
    private Projector projector;
 
    [SerializeField, HideInInspector]
    private Color _originalColor;
 
    private bool hasOriginalColorBeenSet = false;
 
    private void Start()
    {
        projector = GetComponent<Projector>();
 
        if (!hasOriginalColorBeenSet)
        {
            _originalColor = projector.material.color;
            hasOriginalColorBeenSet = true;
        }
 
        AdjustIntensity(intensity);
    }
 
    private void AdjustIntensity(float value)
    {
        Color adjustedColor = new Color(_originalColor.r * value, _originalColor.g * value, _originalColor.b * value, _originalColor.a);
        projector.material.color = adjustedColor;
    }
 
    private void OnValidate()
    {
        if (!projector)
        {
            projector = GetComponent<Projector>();
        }
 
        if (!hasOriginalColorBeenSet)
        {
            _originalColor = projector.material.color;
            hasOriginalColorBeenSet = true;
        }
 
        AdjustIntensity(intensity);
    }
}
 

Unreal Engine Mobile Development Tips

  • Make sure lighting is built before running on a device.
  • Most Post Processing features are disabled for mobile platforms as they are too expensive, like like vignette or screen space reflections. Some GPU intensive features like Bloom and Depth of Field are enabled by default so that PC and mobile look the same but many features can cost 60 milliseconds or more with the default settings on some devices. The console command showflag.PostProcessing 0 can be used to turn off these features to get a general idea of their costs.
  • Make sure to use Precomputed Visibility and that it is set up properly. To do this, place Precomputed Visibility Volumes around areas where the player can walk or jump and then build lighting. You need to make sure to place these in the Persistent level that is used when building lighting and when running the game, so do not build a sublevel by itself. You can verify that Precomputed Visibility is working by entering the console command Stat Initviews on device or in the level previewer and making sure that Statically Occluded Primitives is greater than 0. Use the console command r.ShowPrecomputedVisibilityCells 1 to visualize the cells in the editor.
  • Use masked and transparent Materials sparingly. Only use them in places where they cover a small part of the screen. iOS devices are very optimal in shading opaque surfaces, as they will only shade each pixel once, but for masked and translucency, every single layer will have to be shaded. The total GPU time of a frame can be doubled or more by having overdraw. Use the Shader Complexity view mode to investigate any hot spots.
  • Draw calls of the entire scene should be <=700 for any single view. Areas with poor occlusion, like looking over a large landscape, is going to be biggest challenges for this. This can be seen with Stat OpenGLRHI on device or Stat D3D11RHI in the Previewer on PC.
  • Triangle count of the entire scene should be <=500k for any view. This has been determined to be the maximum poly count that can hit 30fps on both iPad4 and iPad Air. This can be seen with Stat OpenGLRHI on device or Stat D3D11RHI in the Previewer on PC.
  • Materials should use as few texture lookups and instructions as possible. You have five texture samplers available, but using all of those makes for a fairly expensive Materials. For now, use the PC instruction count to optimize and the Previewer shader complexity to visualize the total cost.
  • Only use independent texture fetches in Materials. This means UVs in the pixel shader (BaseColor, Roughness, etc.) must not be manipulated in any way, such as scaling. Use the CustomizedUVs feature instead to do the scaling in the Vertex Shader. Some special features like environment mapping require math on the UVs and that is OK for special cases.
  • It is recommended to use square textures as they have less memory waste. Always use power of two dimensions for these (256×256, 512×512, 1024×1024). Use the console command ListTextures in the Previewer to see where all the texture memory is going.